I'm wondering if it would be helpful if we were to cut a practice plate together? Here is the thought... I could draw up a
simple scroll design, upload it and then people could download and transfer it to a practice plate. I would also transfer it to a plate and cut it with the video camera
on and then upload the video. We could do it in sections... cutting outline, background removing and then shading... I'll start sketching a quick design that might
work.
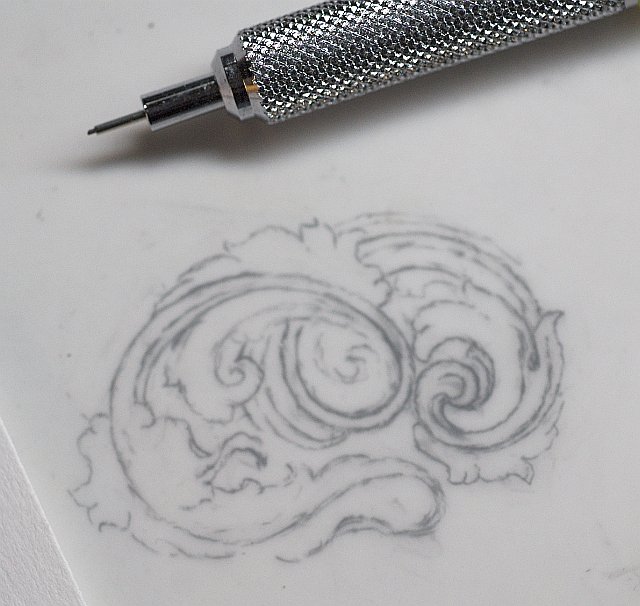
Thought I'd post the rough sketch so that the drawing process can be seen. I like to draw with a .3mm pencil and HB lead. I
sketch light to start with and as the design progresses I'll draw darker.
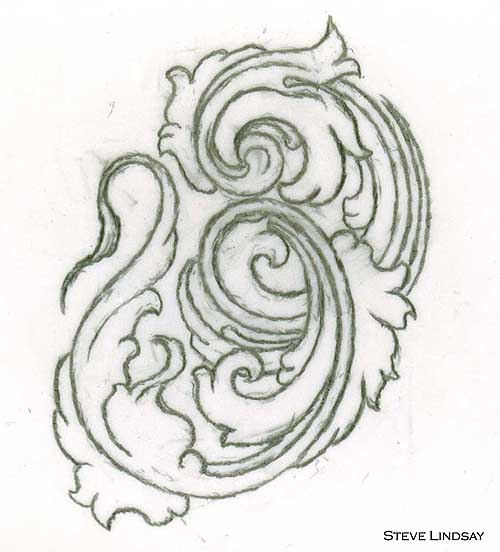
Here is the drawing finished. Not pretty, but finished enough to know the plan for engraving it.
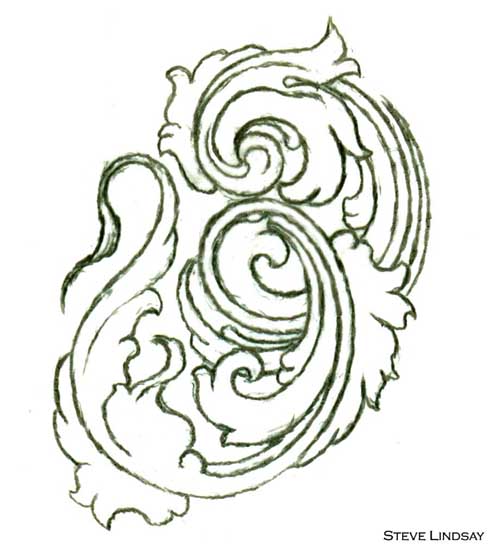
Next open the scanned image in photoshop and increase the contrast. The idea is to get rid of the grays so that we can print
and transfer it easy. In photoshop click on Image/Adjustments/Levels... and play with the levels to increase the contrast. Here is what it looks like after that...
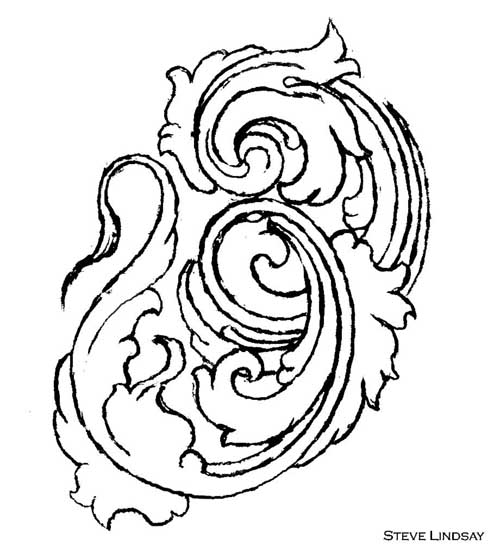
Now in photoshop click on: Image/adjustments/Threshold... and adjust the threshold to turn it into nothing but black and white
with no grays. Here is what it looks like after that...
.9" x .7". Don't print
it huge to cover the whole practice plate! I have noticed at shows that people who are learning seem to engrave huge. It is much harder to engrave large than to
engrave small! .. plus I find I can get more money for small delicate engravings than large bold stuff. So think small... I promise it will be easier to cut anyway.
Although the size of this engraving is still somewhat large
to what I'm doing on the knife and watch engravings, but it is small compared to what I see beginners sometimes engrave.
The file print size including the white space around the design is: .906" x 1"
The design will need to be flipped over before printing and transferred so that it won't be a mirror to the one I'll cut in a video. I have flipped the image and
saved it as a tiff file. A tiff file retains the print size. You should be able to download it, open it in your favorite paint program and just click print.
I finished cutting the plate. The file is 15 minutes long and 478 megs big.
>
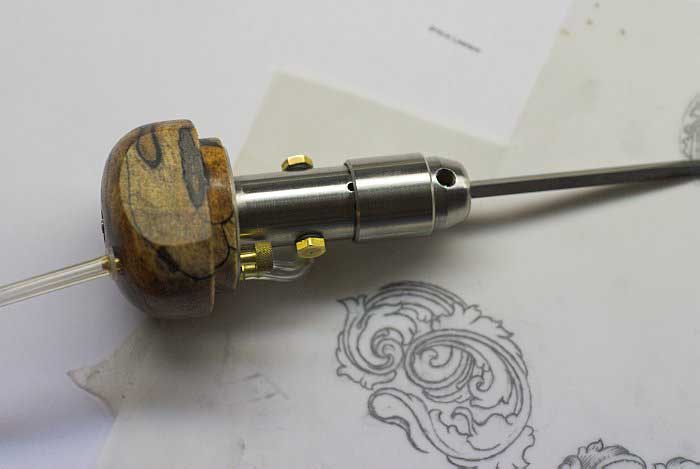
I am using a PalmControl to cut the plate.
Something that is noticeable through the videos is that I speed up after I get warmed up. I find I do this with shading too.
I'll start out slower in the morning and after a few minutes into it I'm up to speed.
When ending a cut that has any depth to it, always pop the chip out at the end. If you don't, you'll leave the
chip standing up which will cause blood to flow from your finger if you run into it. The exception to popping or flicking out the chip is when a gradual taper is
desired at the tail end and then we will want to power out. The tapering or powering out movement is similar to the end of an ice-cream scoop action. I tried to
describe this in an earlier beginner video tutorial. The videos at the top that
earlier tutorial page illustrate powering out
to create a tapered tail end.
As Mike mentioned in another thread titled "jumping the ditch", the chip should also be popped out when
intersecting a line to prevent crashing into the other side and causing damage to it. In the middle of the
Brannen Brothers flute logo engraving video
I begin the block lettering. It is an example which illustrates the situation Mike describes. To engrave the block letters more efficiently, first, I use a flat graver
without a heel just to stab and square up the ends. Then I use a V graver and intersect the stabs. I time the cut right and just short of intersecting the line I flick
the chip out so that it breaks into the intersecting line or stab cut. Another method to prevent jumping the ditch is to just power it through into the intersecting cut
but this isn't as fast because you have to be more careful not to go too far. Either way will work though.
The graver point used to cut this was a 116.68 degree point made with the Hamler
universal template for his sharpener.
This is the angle of the presharpened gravers that are currently sent out with the tools.
While cutting the outlines I had the stroke adjustment set so that half of the first exhaust hole was showing and just the start of
the next two holes. Air pressure was set around 40 PSI. Here is a pic of the bottom of the tool so that the amount of the three exhaust holes can be seen.
Next step is removing background.
I opened the image up in photoshop and used the fill bucket to show what background we will be removing.
As a side note, if part of this were to be inlayed in gold, now would be the time to do that. When I only want parts of the scroll in
gold but I cant't decide which parts, I use a yellow pencil on paper or the fill bucket in photoshop to help decide. Open the image in photoshop and select yellow color
and then simply click on various stems or leaves to fill them with yellow. Once that is decided, start cutting away those sections and undercutting. Although when
cutting away for gold stop short of cutting into the outline of the leaf. Here is a sketch of what I mean...
I won't be inlaying gold in this practice plate. However, if gold were inlayed as I tried to describe above,
after going through the sanding grits the next step is simply to scoot the graver in the original V outline cuts that are still around the gold. There will be small
pieces of gold laying there that doesn't take much but sliding the V graver around the outline to clean it out. From this point the project is the same as if you didn't
inlay gold. Just remove background and shade.
Finished cutting the background. The first video is being uploaded now. There are three videos for background. I could have had it
finished some time ago but I fought this silly computer for three hours. These things are supposed to make our lives easier... but I sometimes don't know about that.
Maybe I need a Mac like Ray got himself.
Originally Posted by KDavid: Steve, what size and type of burr are you using? David
David, The first bur has a ball end that measures .030". The second is a bur I ground on the diamond lap. It is ground to a shape similar to a regular screwdriver
blade. It is tapered so that the tip measures around .010". To make one of these, grind a carbide bur down to a point by installing it in the rotary handpiece, step on
the pedal to turn it on and hold the carbide bur against the lap. This will grind the bur into a tapered point. Next place facets on it. The facets are just eyeballed
and a bit random. Place your index finger on top of the bur so it doesn't turn while grinding against a lap. Place facets on it and try cutting with it. If it doesn't
cut well, hold it back up on the lap and place another flat on. Keep doing this until you get it to cut nice. I have found that a shape somewhat similar to a regular
screw driver will usually cut nice.
I started using a dental handpiece for background around 1982. The rotary handpiece I used then was made by Buffalo Dental, but I now use a NSK Presto handpiece. Before
the rotary I was cutting background out with a flat graver using the impact hand graver. When cutting background using a flat you have to do some recutting with the V
next to the leaves and borders adjacent to the background. This was to give a ditch to cut up to when chiseling out with the flat graver. Having to recut, then use a
flat graver and then stipple with a punch is a much slower process than buzzing it out with the rotary.
After cleaning out a space with the smaller cutter, back out of the space while bouncing it up and down... By doing this we do not have to take another step later to
stipple because the rotary did the stippling at the same time.
It may take some time to get confidence with the rotary to split lines next to scroll or borders. If you feel less confidant about getting close, it works to first do
some recutting with a V so you'll have a wider line to split.
The rotary cutter will cut clean on one side of the cut and it throws up a bur on the other side. The clean cutting side is on the right side. Therefore always split
the lines next to leaves and borders with the right side.
Here are the shading videos
Hi Roger,
Concerning the graver tapering I used. I was thinking after I saw the shading video that I should have used a smaller faced graver
just for the video because I have received questions about this before. When engraving I don't think I'm even thinking about or looking at the size of the graver face.
I must only be looking at the tip of the point. This could come from getting used to working under higher magnification as even a small faced graver is going to look
big and a person gets used to looking at the actual tip and doesn't notice the meat it is connected to.
I used to grind my shading graver down to a tiny face but after years of resharpening it and being too lazy to re-taper it the
gravers would get shorter and fatter.... and then I got used to and favored this over a long tapered graver with a tiny tip.
I am convinced that a beefy shanked graver will cut better (more efficient) in an impact tool than one
that is tapered down long and thin. It has to do with rigidity. I have tried to explain the theory on the
graver tapering page.
But that being said, I think a thinner shanked graver would have probably been better just for the video. I didn't have a problem
seeing the point under the scope but in the video it is harder to see.
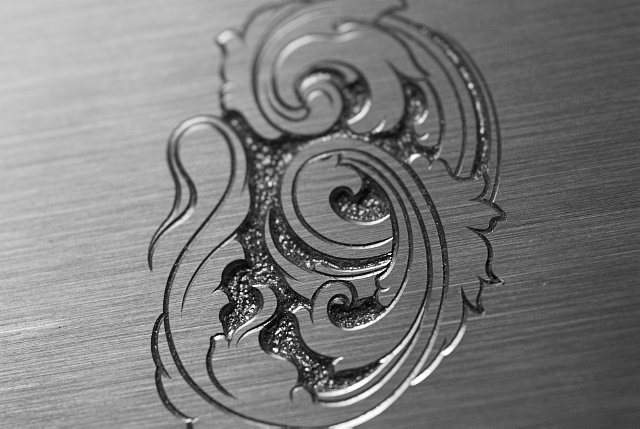
Here is a pic of that much of the shading. The shading was inked for the photo. When the background is filled in
with flat black lacquer color it will appear more evenly matted. The ink for now is only in the shading for this quick picture.
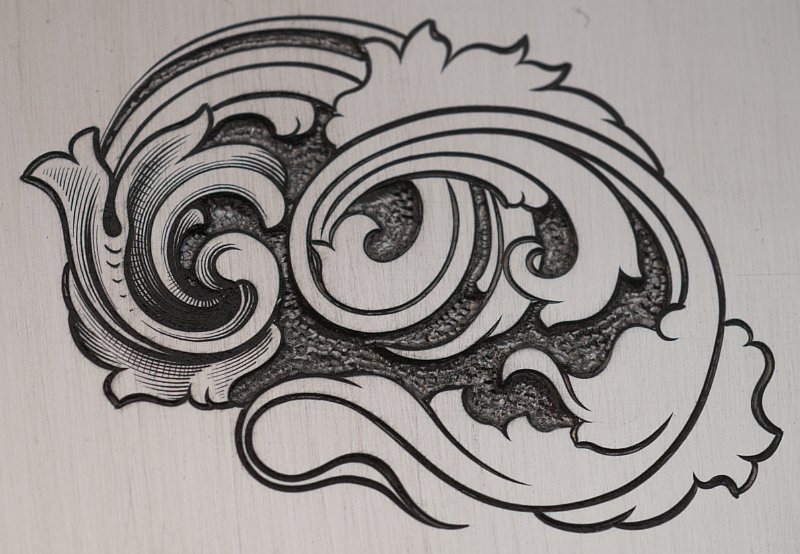
Here is the ordinal drawing with quick shading sketched in and some of it shaded on the plate.
Copyright information
The design drawn and engraved above is of course copyright Steve Lindsay,
however I (Steve Lindsay) give permission for engravers to use it for
practice, but it is not to be sold. In other words, feel free to use it for
practice and learning to engrave, however please do not sell the design
(engraved, drawn or otherwise). This is to encourage engravers to create their
own designs, scroll and engraving that they will become known for by
collectors, and in turn be able to make good money at.


.png)